For this tutorial, I will show you how to create your own blog using this template and deploy it to the internet. I will be using Netlify as my static hosting because it is what I use for my projects. You can use any static hosting you want. (Not the best instructions I did but at least it helps you get started 😅)
1. Clone this repository
You can go to the GitHub repository of this template and click the “Use this template” button. After that, clone your forked repository on your local machine using the command below. Make sure to replace your-username with your GitHub username and you have the forked repository on your account.
git clone https://github.com/your-username/astro-basic-blog.git2. Install dependencies and create your content
For that, you need to install the dependencies using npm install (or whatever package manager you use) and open a dev server using the npm run dev and go to http://localhost:3000 to your browser. After that, you can now create your content using MDX in the src/pages/posts folder. You can also change the design src/pages/index.astro file to your liking.
On creating a blog, create a new file ending in .mdx in the src/pages/posts folder. Make sure to add these contents so that the blog will be shown on the homepage.
---
title: This is the title
description: This is the description
pubDate: 10/31/2022
---
Project Filepath
components - The components folder of your project. This is where you can add your reusable components to your pages. You can use a JavaScript Framework or Library here if you want.
pages - The pages folder of your project. This is where you can add your pages. You can add your blog posts on the /blog folder using MDX.
images - The images folder of your project. This is where you can add your images. Astro will automagically compress them for you so you don’t need to worry about the size of your images and the performance of your site!
3. Deploy it to the internet
After you create your content and pushed the code in your repository, you can now deploy it to the internet. I will be using Netlify for this tutorial. You can use any static hosting you want if you want to.
Before we start
Go to Netlify and login to your account. If you don’t have an account yet, you can create one for free using GitHub or an email and password.
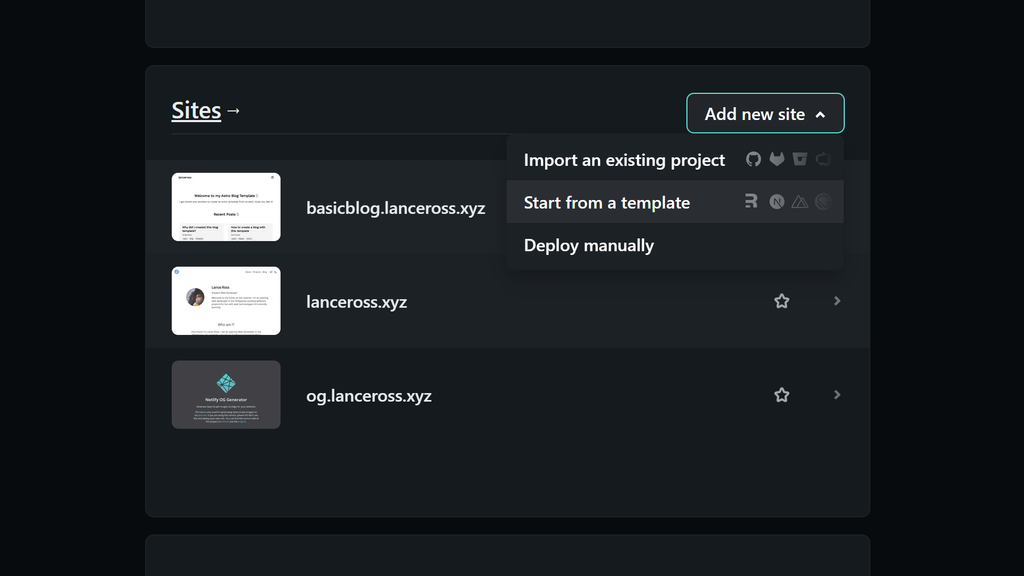
Step 1
Click the “Add new site” button and select “Import an exisiting project”.

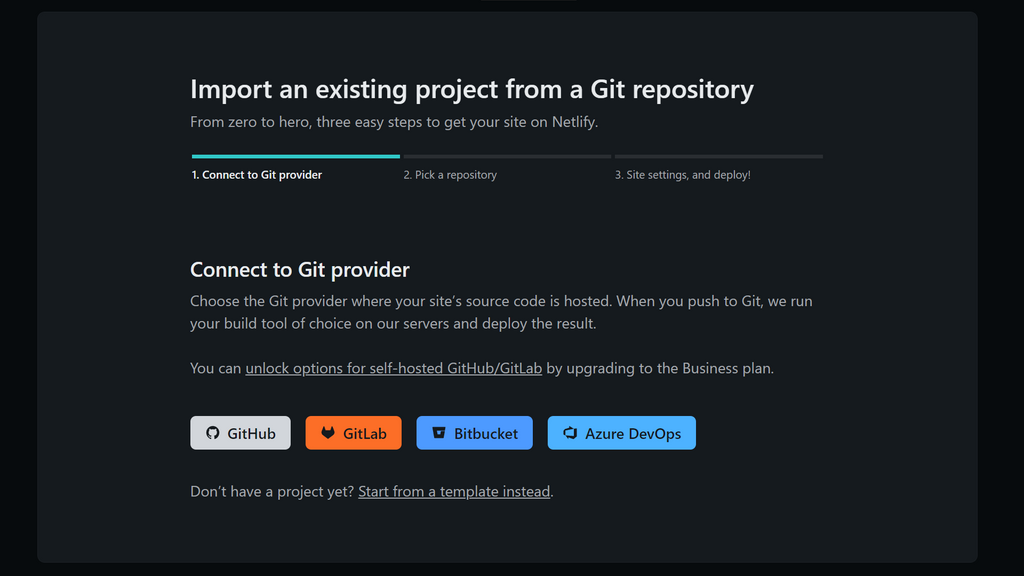
Step 2
Click the “GitHub” button to connect Netlify to your GitHub account.

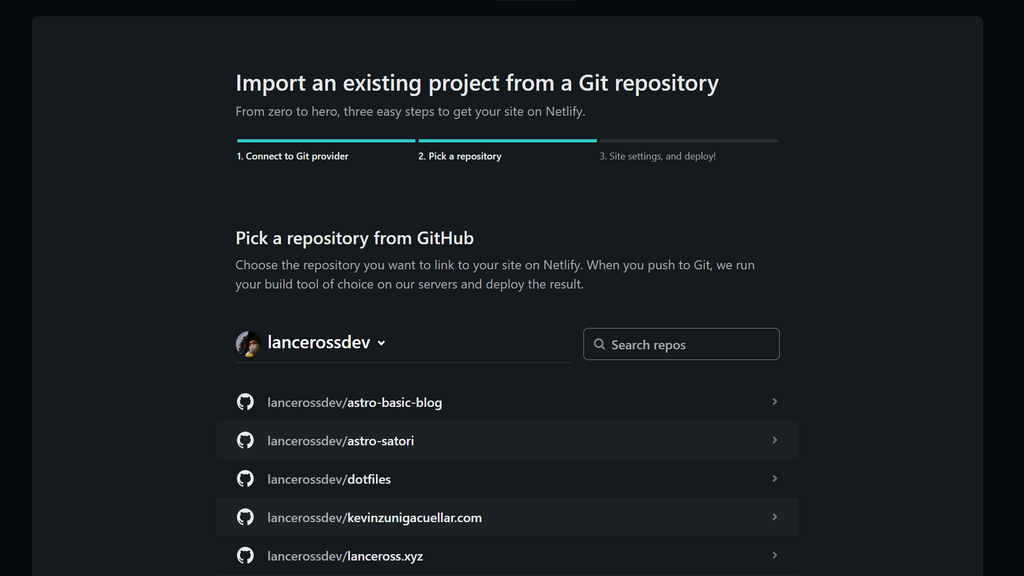
Step 3
Select the repository you want to deploy and click the “Deploy site” button. Netlify does the job automagically for you!

And there you go, you just created your blog in Astro and also deployed it to the internet. Make sure to follow me on Twitter for updates about me and GitHub for my latest projects out there!